Even though it almost goes without saying, I’ll say it anyway: with highly automated appliances like these,
the quality of your components not only will determine your machine’s life span and value, but also the quality of what you get in your cup.
The other half of the equation is
settings. Otherwise, you’re just chucking in beans, water and milk and hoping for the best.
For that reason, I’m going to walk you through dialing in your machine. I’ll weave in important insights about the components in question at the same time.
Before getting into that, I’ve put together a list of
must-haves based on my reviewing experiences. After all, fully automatic espresso machines are all about convenience with a capital C. These things go a long way to achieving that, so try and make sure your chosen model ticks as many of the boxes as possible:
- Go large on your drip tray to avoid the annoyance of frequent emptying and the machine going on strike when it’s full.
- The same story applies to the used grounds collection container.
- Look for an adjustable coffee spout that’ll max out at around 5.5 inches (14 centimeters). That way you’ll have enough room for latte macchiato glasses and travel mugs to fit underneath.
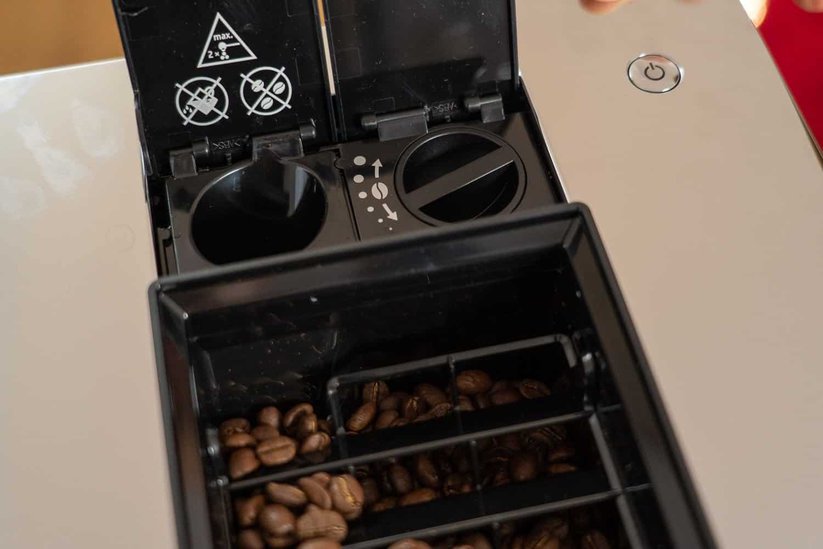
- Look for a water tank and bean hopper that are neither too big nor too small and covered with opaque lids. That’ll discourage algae growth in the water reservoir and protect your precious beans from UV radiation.
- Opt for a grinder that can easily be adjusted without using a tool — more on this below.
- Look for an actively heated cup tray because warm cups equal warm coffee.
Using the Right Water
A coffee break without water just leaves you, well, gnawing at bitter beans. And since that’s not quite what we’re looking for, no one’s going to argue that
water is key to coffee preparation.
Seeing as it’s a pretty big deal, it’s worth driving home a few points relating to how water can impact coffee flavor and determine the life of your machine.
It’s obvious when you say it out loud, but
freshness matters. You don’t use old, stale beans, so why use old, stale water? Not to mention, leaving water to stagnate in your tank is a big no-no.

As fresh water leaves the faucet or filter, it mixes with oxygen, and the resulting bubbles are essential to good coffee.
Just to be clear: a filter — whether built into your machine or of the
Brita jug variety — won’t transform your water into a magic liquid that’s better suited to brewing. The primary function of a water filter is to extend the intervals between descaling your machine. I’ll get into this in more detail when covering cleaning.
A much better freshness hack is the tank size.
So to that end, unless you have an office full of blurry-eyed people to caffeinate, bigger is not better. Extra-large water tanks just tempt you to fill them and forget. With a small one, you can’t help but refill it frequently — so freshness is guaranteed.
Talking about water volumes, it almost goes without saying that quantity affects the strength of your brew. In fact, this is one of my pet peeves. A proper espresso shot should clock in at around
1 ounce (30 milliliters). However, most super automatic espresso machines deliver about
1.3 ounces (38 milliliters) into your
espresso cups. Why? Beats me.
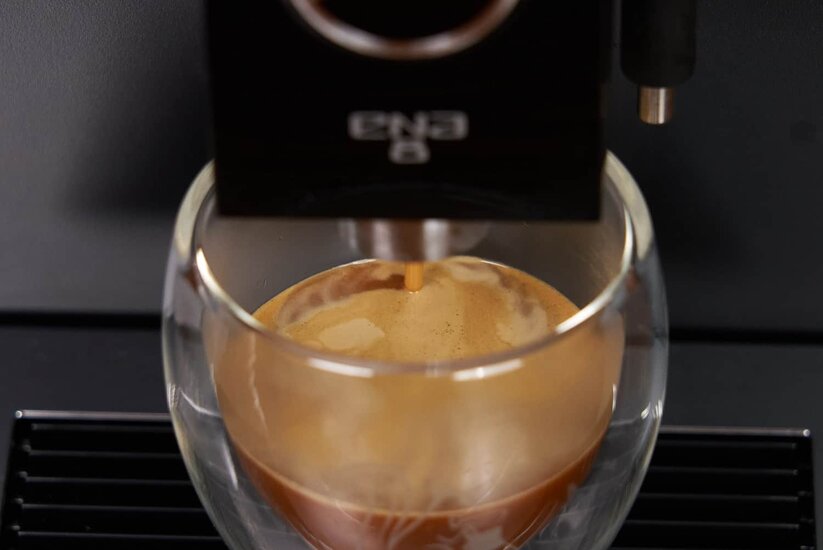
At least the pricier models allow you to adjust this — and to be honest, it’s one of the first things I check when pulling a shot on a new machine.
Inevitably, though, I end up reducing the volume. Don’t let the fact that it’s somewhat confusingly referred to as “cup size” throw you, either.
The other water parameter that you have to play with is
temperature, which takes us to the next set of super automatic espresso machine components and settings.
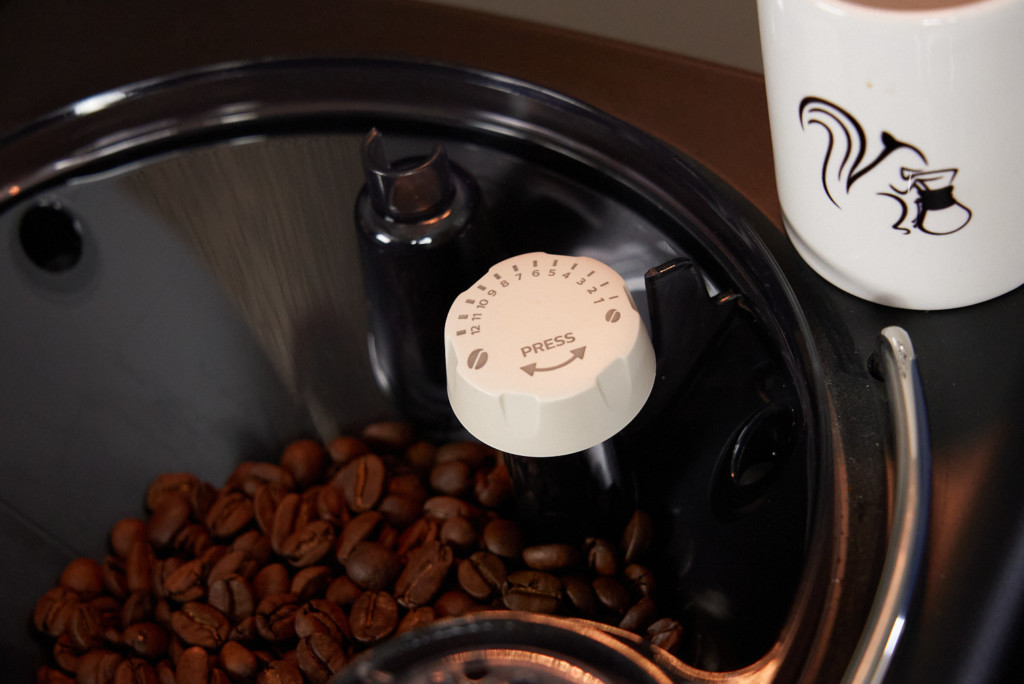
The Right Grinder Settings and Coffee Strength
There was already quite a lot of talk about grinders in the product sections, and for good reason. This component and its correct calibration more or less
define the quality of your extraction and the resulting flavor profile in your cup.

As a rule of thumb, the finer you grind, the more authentic your espresso will be. That said, differences between various grinders’ increments and how easy it is to adjust them are huge.
Worst-case scenario, you get a grinder you can’t adjust at all.
Best-case scenario, you get a stepless (infinitely adjustable) grinder. And since those are usually the preserve of seriously pricey machines, look for one with as many grind settings as you can afford. An easy-to-use adjustment knob or dial is also vital. Honestly, Saeco, no one wants to fiddle with a hex key. Ugh.
Keep these points in mind when researching a machine:
- You want a nice uniform grind to ensure even extraction.
- The built in grinder is largely responsible for how noisy a machine is.
- As the part that sees the most wear and tear, the grinder is usually the first thing to break. So, get the best quality you can.
Grinders in super automatic espresso machines are specced and classified according to two features: material and mechanism type.
When it comes to materials, we’re talking either
ceramic or stainless steel, while the mechanisms divide into conical or flat burrs. In both cases, there’s no clear-cut best bet — each option has its advantages and disadvantages.
Ceramic is supposedly less noisy, but don’t count on it. My top picks for the quiet life are the Jura E8 and higher models, which have stainless steel, conical burr grinders.
I’m also not convinced about claims that ceramic lasts longer. My sense is that
stainless steel is tougher, though the one clear advantage of ceramic is you never have to worry about rust. Hey, no argument there.
The bottom line: don’t get too hung up on the material. The grinder and build quality are arguably more important.
Next, let’s take the mechanisms apart. I’ve added blade grinders into the table for the sake of comparison, but don’t go there. Seriously, don’t. These cheapos just chop your coffee beans into oblivion.
You’ll notice that small super automatics, like the Espressione Concierge, tend to have conical burr grinders because the mechanism is more compact.
On the other hand, flat-burr mechanisms are larger because the stacked rings take up more space than the nested conical design. What’s more, supersizing the burrs has the advantage not only of reducing grinding time but also improving flavor. Why?
Heat can’t build up and compromise your beans’ delicate aroma.
Rather than obsessing over which material or mechanism type your super automatic espresso machine has, redirect your energy into looking after your grinder. Regular care prevents glitches and faults,
so remember to:
- Adjust your grinder correctly — while it’s running.
- Regularly disassemble your grinder to give it a thorough clean. It’s not that hard. Pinky swear.
- Keep an eye out for little stones or other debris that can wreck the grinder.
The first point is a real moment of truth for a machine as a whole. Will it literally choke on the finest grounds the grinder can produce, or will the pump pressure and brew unit come to the party?
Remember,
the finer the grounds, the more pressure is necessary to force the water through the puck. Plus, the higher the risk of fine particles clogging parts before extraction even starts.
Of course, grind size isn’t the only factor that affects extraction. Higher pressure is necessary to drive water through more coffee grounds, resulting in more intense flavor.
Coffee Grounds Dosing
So to keep things simple, manufacturers tend to use a simple bean scale. More bean icons mean more ground coffee in the puck.

Combining these two settings — the grind size and dosage — is important, especially as it’s where many people slip up. Here’s
a quick summary for you:
- Watery coffee is the result of water passing too quickly through the puck. The grind may be too coarse and the dose too small.
- Muddy sludge ends up in your cup. The grind may be too fine and the dose too high.
You’ll have to play around until you hit the sweet spot, but a good display with intuitive, easily navigable menus will make your life a whole lot easier.
Word to the wise: once you’ve made all the tweaks to harmonize the water volume, grind texture and dosage to create a perfect hallelujah of an espresso, stop fiddling.
After all, a great espresso is not only a glorious thing in its own right, but it’s also the basis for all the other specialty coffee drinks that your machine makes. So once you’ve nailed it, don’t mess with it. That said, if you decide to experiment with different beans, you’ll likely have to start from scratch with the settings.
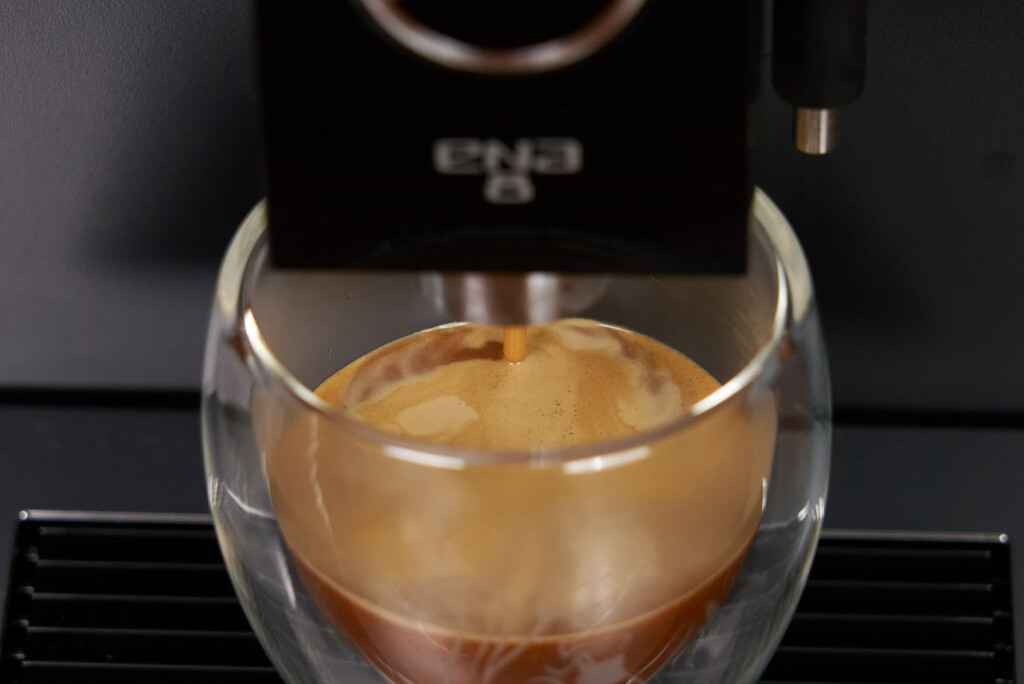
Feeling the Pressure: The Brew Group and Pump
Brewing pressure is one thing, but don’t let manufacturers convince you that more bars are better.
Ideal espresso extraction requires around 9 bars — that’s it. Basically, you need those extra 3, 6 or 10 bars manufacturers love to trumpet like a fish needs a bicycle. Yes, Jura, I’m looking at you!
What’s more, unless your coffee is ground finely enough and tamped firmly enough, it won’t provide sufficient resistance to all that pressure anyway. And since that’s not possible on most fully automatic espresso machines, there’s little point in getting sucked into the numbers hype.

In fact, the pump and brew group
form the black box on a super automatic espresso machine. That’s because you generally have zero control over what goes on in there.
Here’s
a quick peek:
- Freshly ground beans are deposited into the brewing chamber, where the grounds are compacted to form a puck.
- Hot water under pressure is forced through the puck. The resulting extraction flows through a system of pumps and pipes before trickling into your cup.
- The spent puck is then ejected into the dregs drawer.
Add that to the fact that brewing involves a lot of mechanical processes, and you don’t need an engineering degree to figure out that quality materials and construction are vital here. Otherwise, your machine just won’t last.
While (durable) plastic is usually the predominant material, the more stainless steel there is in the mix, the better. As you’re probably already aware,
stainless steel is preferable when it comes to hinges and other moving parts.
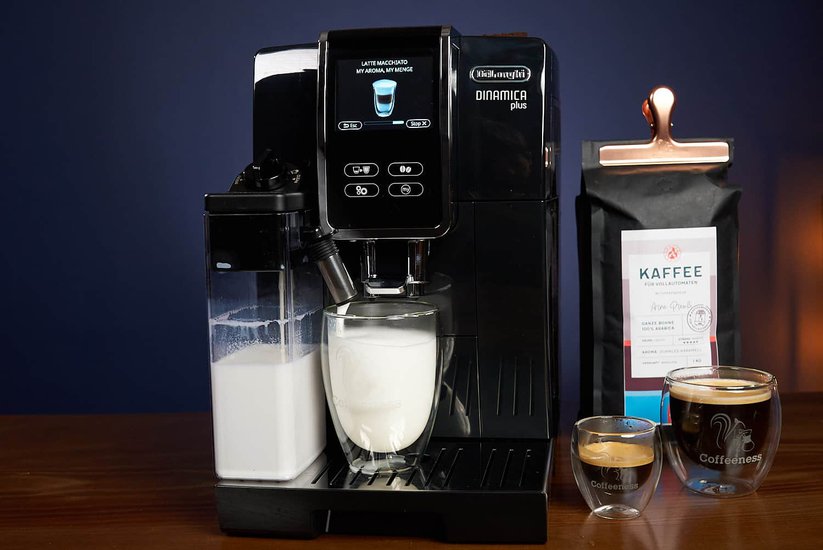
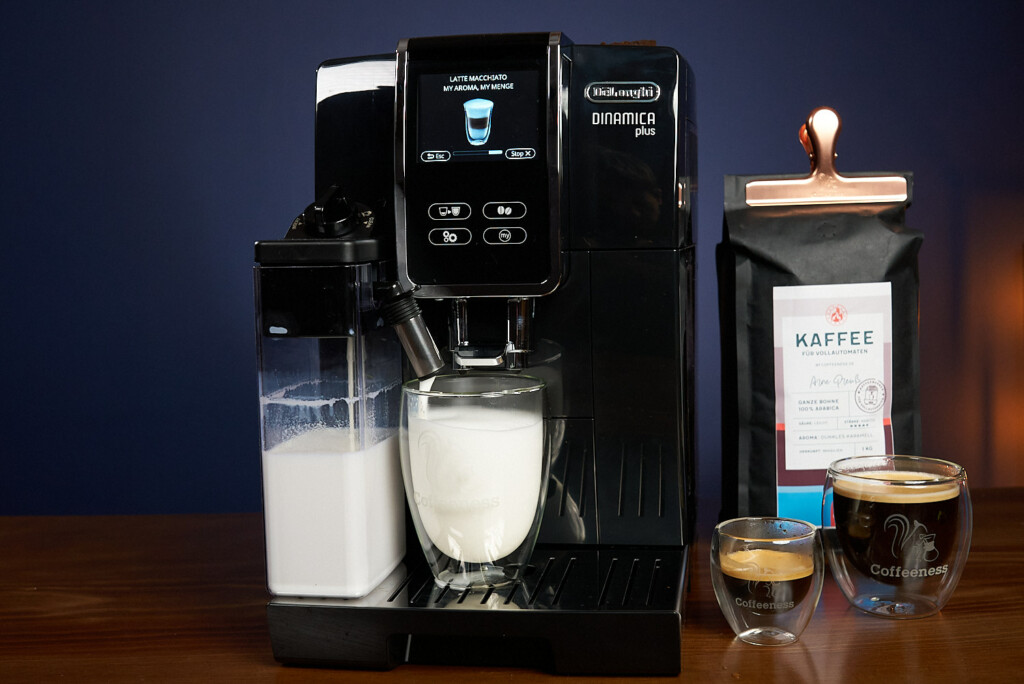
Milk It for All It’s Worth: Cappuccinatores, Milk Systems and Settings
Cappuccina-what?
Despite being more of a mouthful than the drink it’s named after, this milk frothing system is really quite simple. Milk is sucked up a hose and then frothed with steam.
In fact, any integrated milk frothing system is basically a jazzed-up version of this system.
If there’s a special built-in container for the milk, expect that to reflect in the price tag. On the other hand, systems that draw milk directly out of a carton or jug will often be more affordable.
Still, before you go pushing the credit card limits, you should know that simple cappuccinatores
consistently outperform more elaborate systems in our reviews. Here’s why:
- They’re much easier to clean and are far more hygienic.
- Switching between different kinds of milk is easy.
- Simple systems often reduce the machine footprint and are more flexible.
The Jura E8 and Jura Z10 are a real testimony to this, as you can read in the reviews. Sounds too good to be true? Well, there’s a bit of a catch: very few machines produce barista-quality froth for milk based drinks.
Surprise, surprise! You only get barista results with a barista tool — a steam wand. The only problem is that a manual milk frother
not only requires some skill, but runs counter to the whole concept of a super automatic espresso machine.

So what can you do to milk the white stuff for all it’s worth?
Most super automatics let you fine-tune temperature and volume settings. However, Jura leads the way when it comes to doing more. The Jura GIGA 6 allows you to tweak the proportion of milk to froth, while The Jura E8 has an adjustment lever on its professional fine foam frother. Anyway, your
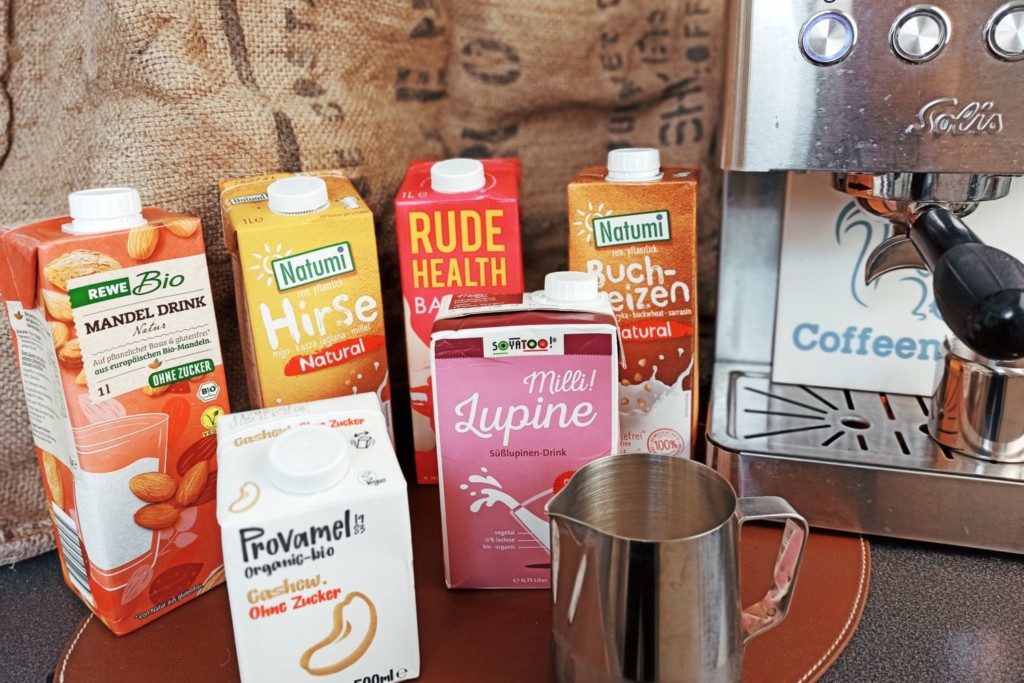
choice of milk is one thing you can control, irrespective of your machine.
Traditional moo juice is a sure thing when it comes to creating
milk foam. While whole milk will deliver bolder, creamier results, products with a reduced fat content still do the job.
As for all those so-called “barista” or other versions whose fat content has supposedly been optimized for latte art, just walk on by. It’s not worth it.

Since milk alternatives struggle to replicate the ratio of fat to protein found in dairy, things aren’t quite so straightforward. You’ll find that’s especially true of rice milk, which hardly froths at all.
When it comes to
plant milk, soy is the froth phenomenon but still might not be your first choice. It can lack sophistication, plus there are potential hormonal side effects. By themselves, coconut and almond milk in cartons fall short of the mark. But if you mix them, you’ll start seeing results.
It might come as a surprise that
homemade nut milks froth up rather well. Just make sure your batch is super fresh and hasn’t separated while sitting in the container.
Basically, you need to accept that you’re in
trial-and-error territory and do a bit of experimenting. Bear in mind, though, that some super automatic espresso machines with a cappuccinatore may need adjusting when changing milk varieties.
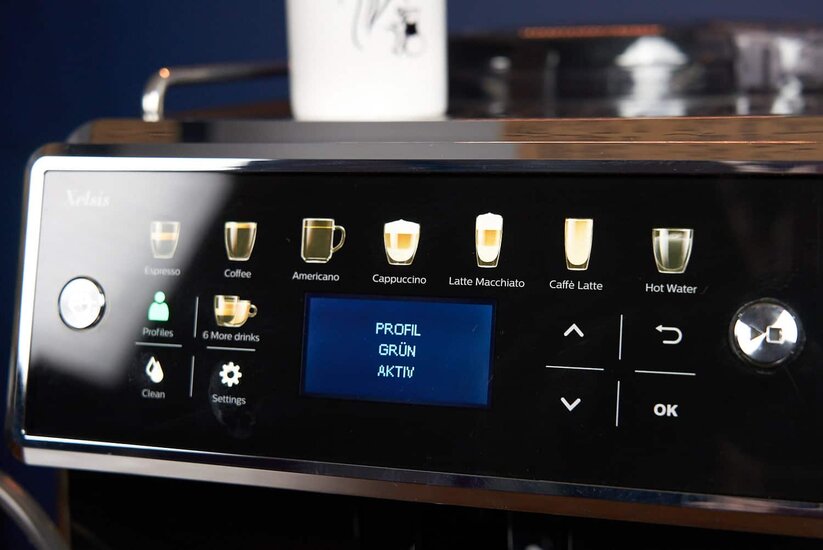
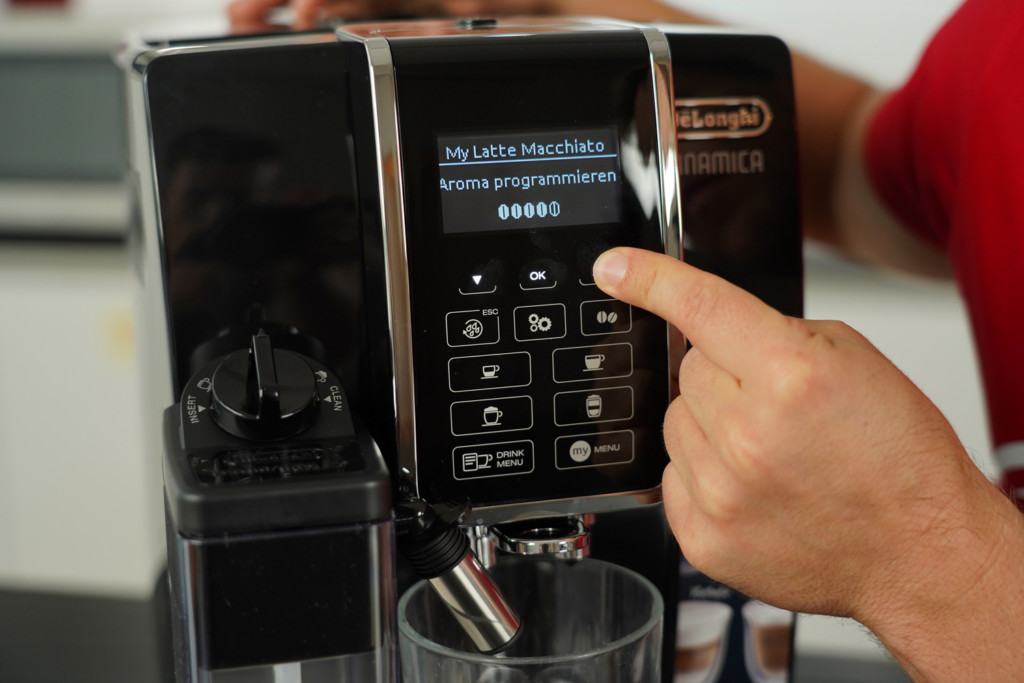
Automatic coffee Maker User Interface: Controls, Display and App
Now that we’ve done a pretty thorough tour of your fully automatic espresso machine’s inner workings, let’s wrap up with the outer connection to all that functionality: the user interface. After all, even an espresso machine with millions of options is useless if you can’t easily locate and use all those features.
It also almost goes without saying that a big-ticket one-touch espresso machine will have swankier, more
digital controls. For some manufacturers, that means looking to integrate the coffee machine into your smart kitchen through app control.
A Saeco sales representative I chatted with at a trade show a few years back pointed out that app control is just the first step on the path to kitchen appliance digitalization. Perhaps that’s why the brand has instead opted for a very generous touch screen on its flagship
Saeco Xelsis.
I honestly can’t fault the manufacturer’s logic. Even with the slickest app,
you still have to walk over and put a cup under the spout. While you’re there, you might as well program the machine.
Before we head down the app rabbit hole, though, let’s figure out what makes for a good interface because once the novelty of a new machine wears off, you just want to instantly put your fingers on a few basic functions.
So no hemming and hawing over what a button or icon might do. Scrolling endlessly through menus — whether in an app or on a touch screen — gets old quickly.
While it’s not the only way to design intuitive controls,
basic, no-frills buttons definitely keep things simple. It’s also why I never recommend a model with a display over the same machine with buttons. There’s just no need for a display if the controls are self-explanatory.
I also have absolutely no problem with buttons that light up like a Christmas tree — as long as all the blinking has a purpose. In fact, many of the inexpensive machines do a great job of guiding you and communicating clearly in this Morse code.
My
very simple test of whether a super automatic espresso machine gets my yay or nay for ease of operation goes like this: if I can set all the parameters to make well-balanced espresso and coffee drinks without having to go back to the user manual, it’s thumbs-up.
There’s no question that apps need to pass the same test. And with virtually every machine setting at your fingertips on a smartphone or tablet, they often do.
Honestly, I’ve got no beef with apps, but let’s not kid around — the manufacturers certainly aren’t. Apps cost you about $200 more and are
ultimately a gimmick to lure serious tech heads. So for that reason, most models with apps are also available with standard controls.
The real appeal, of course, is ordering coffee drinks from the comfort of your couch or bed. Plus, if you really want to test out your machine’s capabilities, doing it with your feet up is pretty sweet. To enjoy that to the fullest, here’s a list of features that I think really
elevate the app experience:
- Select drinks with ease.
- Switch on the machine (from your bed).
- Access the user manual.
- Initiate water hardness tests and maintenance programs easily.
- Contact customer service.
Since there are seldom upsides without downsides, watch out for these
potential headaches:
- Apps are a great way for manufacturers to collect data, and coffee drinkers are a lucrative target market. Consider yourself warned.
- You can’t adjust certain key parameters, like grind size, via apps.
- Manufacturers like to make you think all of your kitchen appliances must be the same brand and form part of the same app ecosystem. Sure, no one’s stopping you, but what’s the point in having your espresso machine communicate with your stove?
- You can buy branded detergents, accessories and other products with one tap. I recommend taking a couple of seconds to check out third-party suppliers because you’ll get a much better deal.
For all that apps make you feel like the age of robot butlers is just around the corner, ultimately, there’s no difference with your machine’s performance or quality.
The manufacturers that currently offer apps with higher-end machines include Jura with the
JOE app and DeLonghi with the
DeLonghi Coffee Link app. In case you were wondering, the functionality is good on both.
Double Features: It Takes Two. Or Does It?
When investigating super automatic espresso machines, you can quickly find yourself not just dreaming big but double. Along the lines of:
- What about making two drinks at once?
- Can I use pre-ground coffee?
I get a lot of questions about how flexible and well-housebroken these machines are, and those two come up most often. I mean, anybody who
enjoys coffee time with family or friends can appreciate the value of being able to make two
coffee drinks at once.
While this feature is typically available in the mid-range models — like the DeLonghi Dinamica — you’re often limited to coffee drinks without milk.
Yep, it’s nice to have,
but is it a deal breaker? Not in my book. At the end of the day, the fact that each drink comes out perfectly counts for more.
Of course, the bigger the household, the more important this is. No one wants to be third in line, waiting impatiently, as the person at the machine fusses over their
espresso macchiato.
Another place I’ve noticed this “two is better than one” thinking in higher-end machines is with bean hoppers. If one person in the household drinks regular coffee and the other sticks to decaf, it’s easy to see how two hoppers could nip a lot of hassles in the bud.

Some of you will point to the powder chute that you can use for pre-ground coffee. While that might seem like an elegant solution, I’ve found that these bypass dosers tend to clog up too easily.
Despite the obvious appeal of having two compartments, there aren’t a lot of machines on the U.S. market that do. Maybe that’s because there’s a catch.
You’ve got two sets of beans but only one grinder. Since a few grounds always remain in the grinder, the decaf drinker is inevitably getting a teeny bit of a buzz. For someone who’s hypersensitive to
caffeine, that’s not ideal.
As a workaround, you should pull at least one espresso after switching beans to clear out the system before making your coffee. The first prize, of course, is two hoppers and two grinders. For that, though, you’re looking at the eye-wateringly expensive Jura GIGA 6.
The last of the double packs are
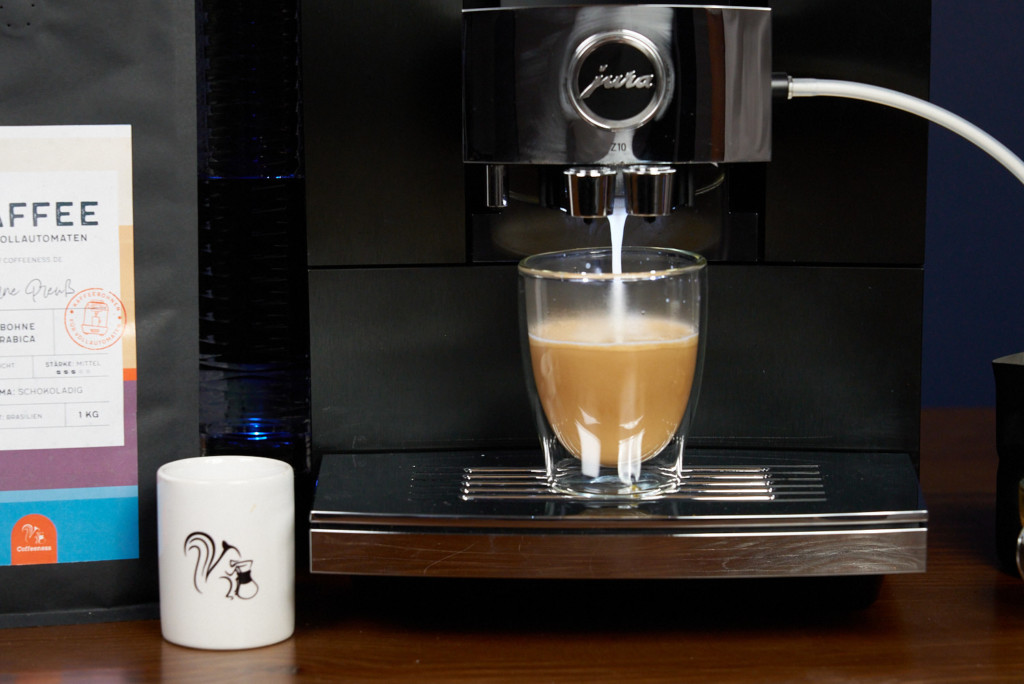
twin thermoblocks in machines like the Jura Z8 and GIGA 6. Now in theory, these give you better control over the different temperatures required for brewing and frothing.
But truth be told, a cappuccino from the single thermoblock Jura Z10
tasted just as good to me as one from the
Gaggia Babila dual boiler machine.
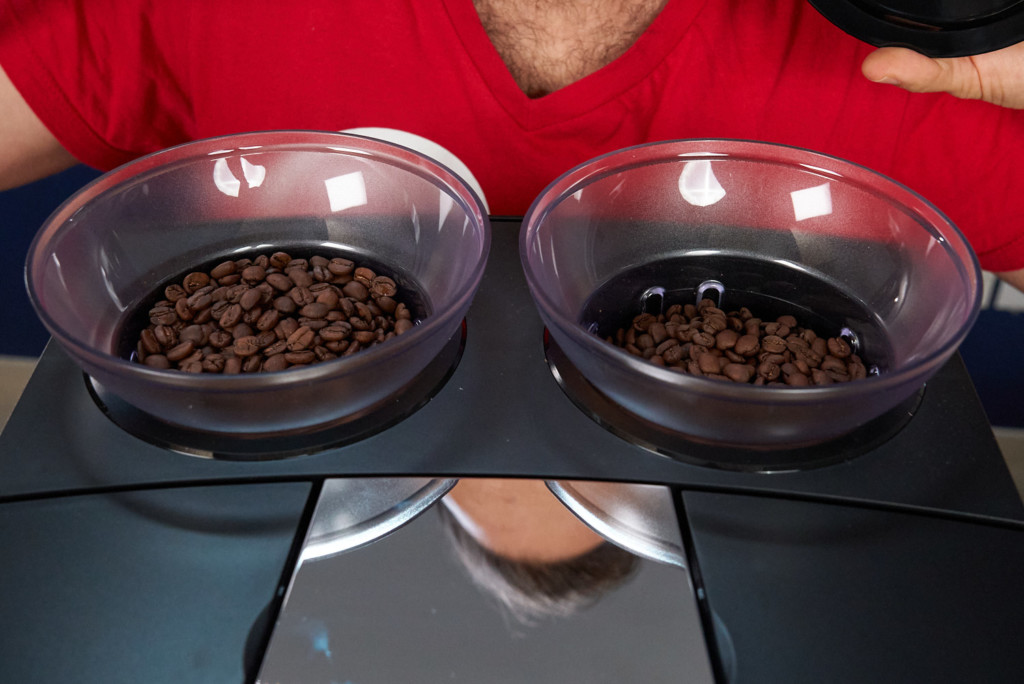
The Best Coffee Beans for Automatic Espresso Machines
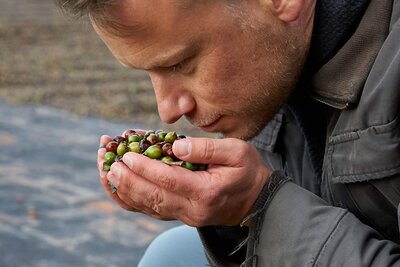

It’s time to spill the beans … on the ones you like most.
Okay, so that was a total cop-out because flavor is very
subjective. However, that doesn’t mean any old beans will do. Not by a long shot.
Listen, it’s not my place to tell you how to live your life. Still, because I care, I’d like to give you some advice on selecting coffee beans:
- Consider brewing with high-quality, fresh coffee beans.
- Whenever possible, buy whole bean coffee from small, independent roasters.
- Don’t be seduced by cheap, mass-market coffee.
- Dare to experiment!
As a rule, slightly darker roasts are the best choice for automatic espresso machines. If you want more floral notes, though,
pour-over drippers do a better job of teasing out that beautiful bouquet.
Be warned that espresso beans that are a knockout in your semi-automatic espresso machine
won’t necessarily lend themselves to a fully automatic espresso machine, which tends to under-extract. The results can be unpleasantly acidic.
Cleaning Your Super Automatic Espresso Machine
Hygiene should be part and parcel of owning a super automatic espresso machine from day one. Unfortunately, many users only get around to cleaning
when things stop working or the coffee starts tasting bad. By then, it is too late.
 Fact
Fact: coffee residue and milk with steam create a really nice petri dish party for mold and other microbes. This can change the taste of your drink, to say the least.
Think about it. You wouldn’t drink a cappuccino out of a cup that hadn’t been washed for a week — at least I hope not.
I know a lot of you are eyeing the automatic cleaning programs and thinking that’s the easy solution. While you should definitely run those regularly, they don’t let you entirely off the hook.
The first line of defense against mold and other nasties is cleaning your fully automatic espresso machine at the end of
every single day that it’s in use.
Here’s a rundown of
my daily routine:
- Rinse out and dry the dregs drawer, drip tray and water tank.
- Clean the milk system.
- Remove the brew unit and rinse it under running water. Leave it to dry overnight.
Honestly, it’s very simple and only takes a few minutes but can add years to your machine’s life.
On top of that, anyone who uses their machine every day should give it a thorough clean at least once a week. Just to be clear: that means
running a cycle with detergent as well as the daily wiping, flushing and rinsing.
Manufacturers recommend wildly different cleaning intervals. But with the daily routine, plus a weekly deep clean, you’re covered.
OK enough with the sermon. In the next sections, I’ll explain the
clean-etiquette for each of your machine’s parts.
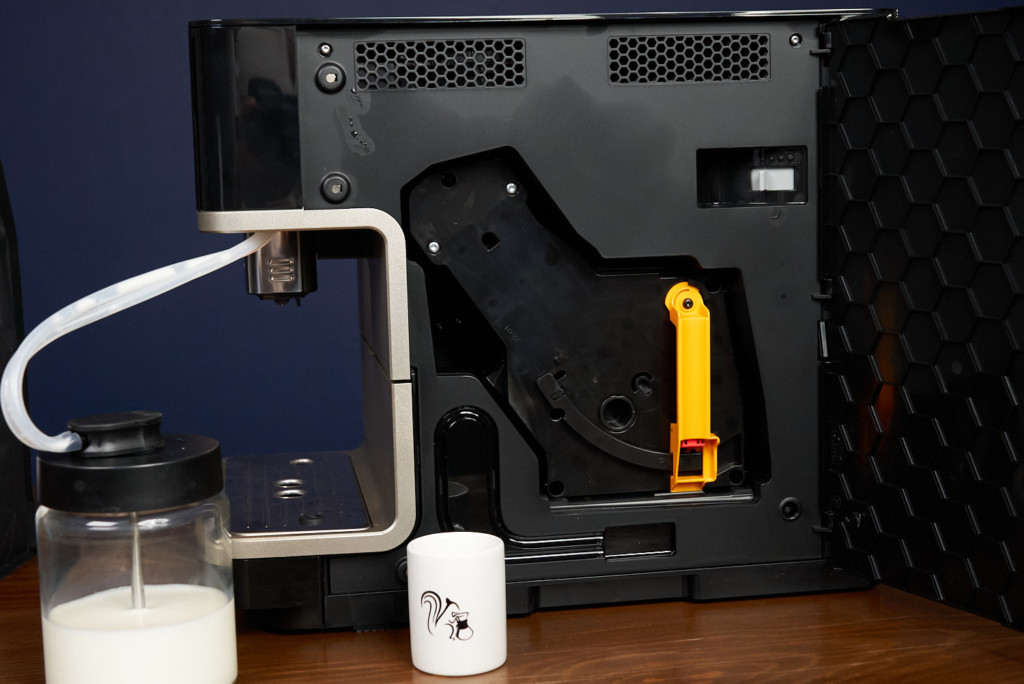
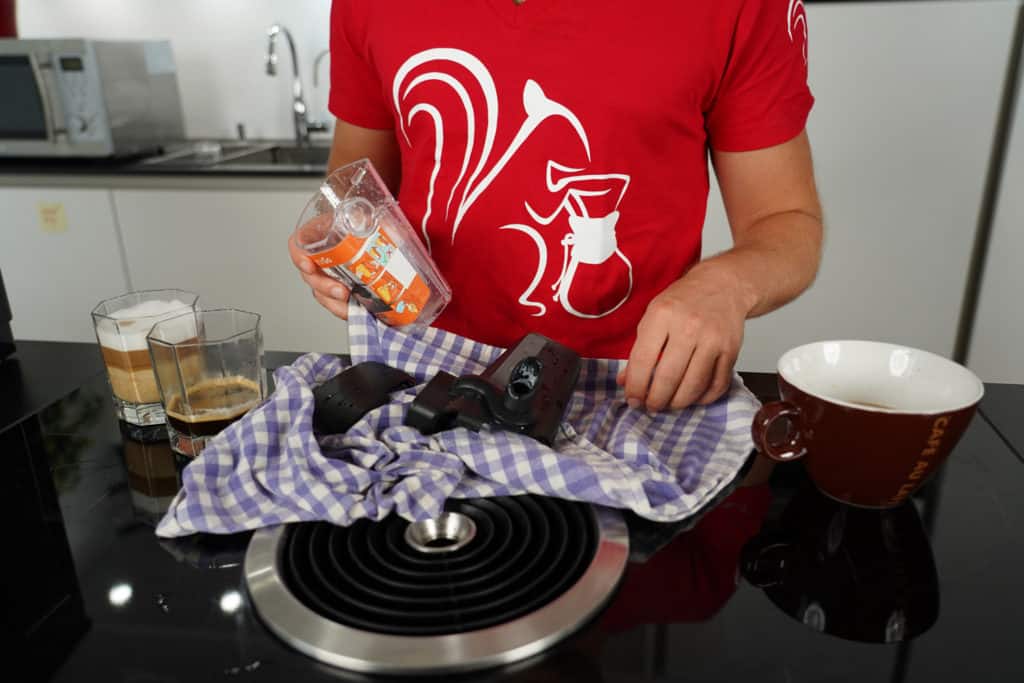
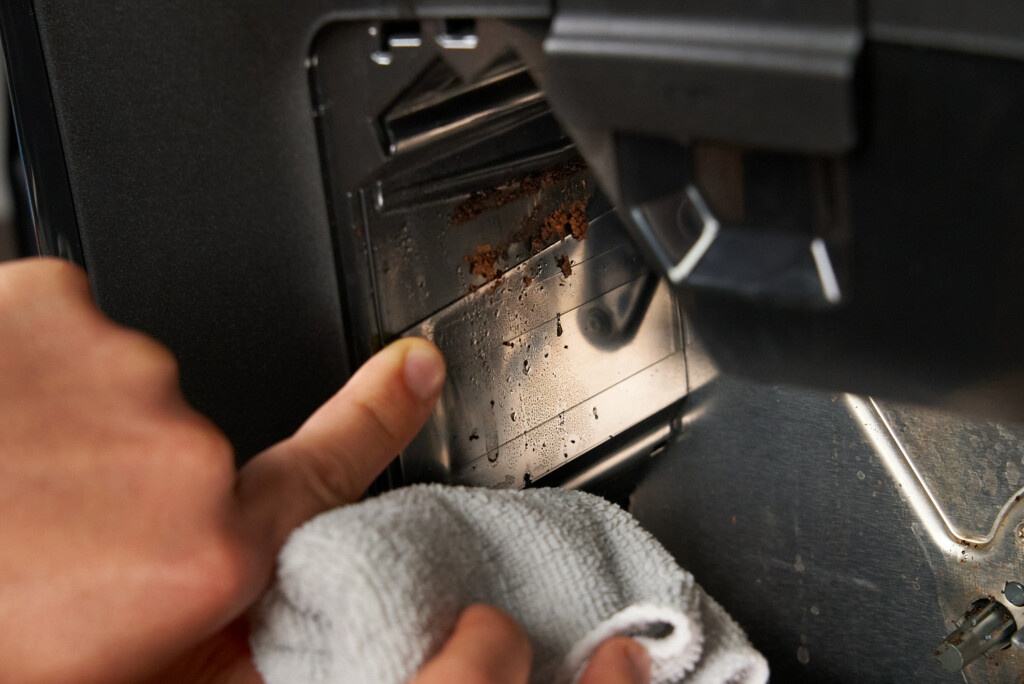
Cleaning the Removable Brew Group
For a long time I was insistent that a removable brew group was the only way to go. That’s why I had such a problem with Jura, which insists on bolting its brew groups firmly in place.
Jura’s argument is that
its automatic cleaning programs are so effective that there’s no need for coffee lovers to worry their pretty little heads over anything.
Well I wasn’t about to just take the manufacturer’s word for it. Instead,
I performed a year-long experiment on a Jura A1, always performing the necessary cleaning tasks. Guess what? Jura was right all along. Once I’d removed the brew group for inspection it was apparent that the manufacturer’s cleaning program really does work!
I will say, though, that
you’re always better off with a removable brew group if you don’t own a Jura. That way you’ll be safe in the knowledge that the thing is getting cleaned properly.
That said, you should always be careful when pulling the brew group out and reinserting it. Not that this is especially tricky, but you just need to keep this point in mind. In doing so, you — and your machine — will be fine.
To avoid jams, only ever remove or replace the brew group when it’s in the neutral position and the machine is off.

I remove my machine’s brew unit every day and rinse it thoroughly under hot, running water. That way, I don’t have to resort to detergent and I avoid scratching it.
Don’t get me wrong, though,
that’s no excuse to skimp on cleaning. In fact, you should go ahead and redouble your efforts because these parts generate a lot of static electricity and can be very susceptible to glitches.
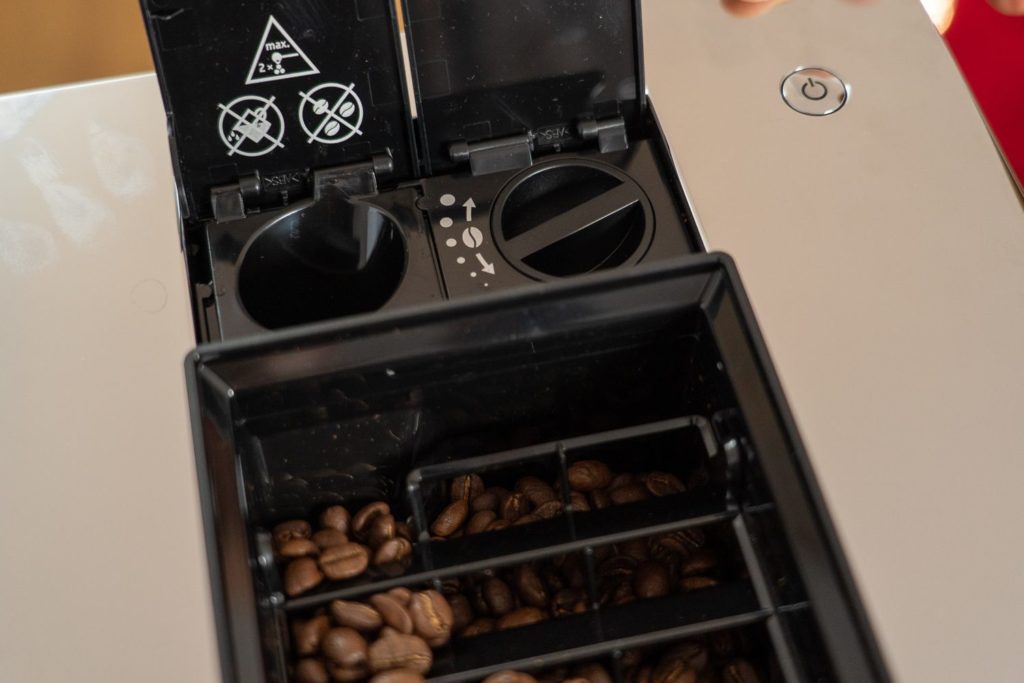
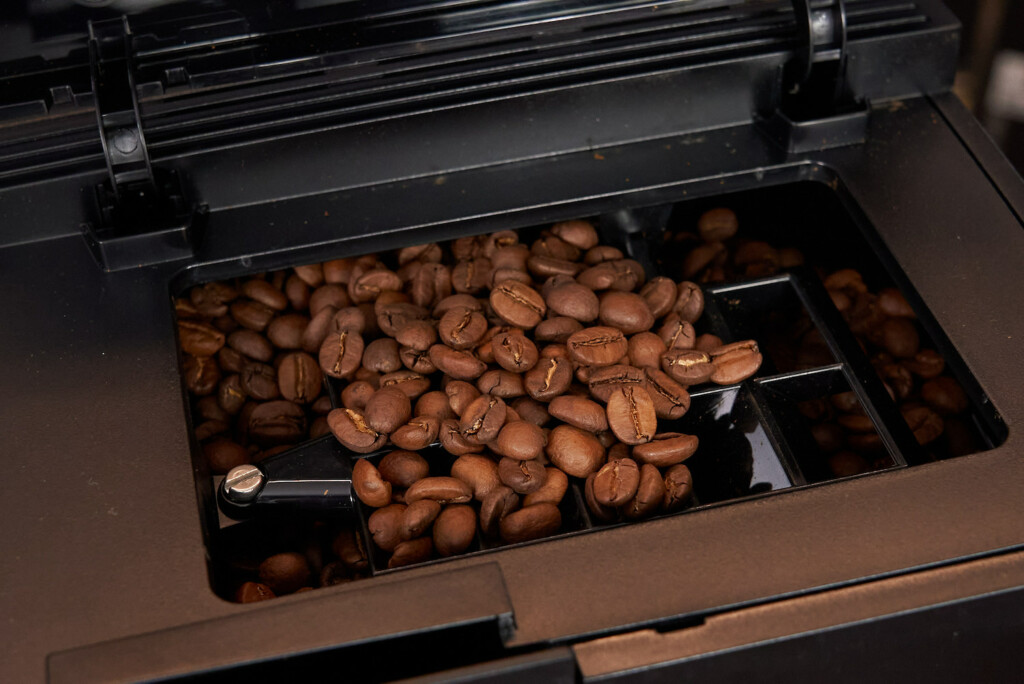
Cleaning the Bean Hopper
Bean hoppers are super automatic espresso machines’ neglected children — seldomly getting the wash and polish deserved.
The problem is that depending on your beans’ roast and origin, they can be quite oily. Furthermore, those oils then collect in the hopper and eventually go rancid.
That’s why I make a point of recommending you
don’t completely fill the hopper. That is, unless you know those beans will disappear fast. There are also other advantages to doing things this way:
- Cleaning the container regularly comes naturally.
- The beans won’t be subject to as much heat.
- Switching between different roasts is easier.
Once empty, cleaning the hopper is
a breeze. Just wipe it out with a dry cloth. And since coffee absorbs scents and flavors, using any kind of chemical detergents is only asking for trouble, so don’t do it.
I’ve often watched in horror as people — even those in the restaurant industry — spray tons of glass cleaner (or worse!) into the containers. For me or any other coffee aficionado,
that’s a disaster in the cup waiting to happen.
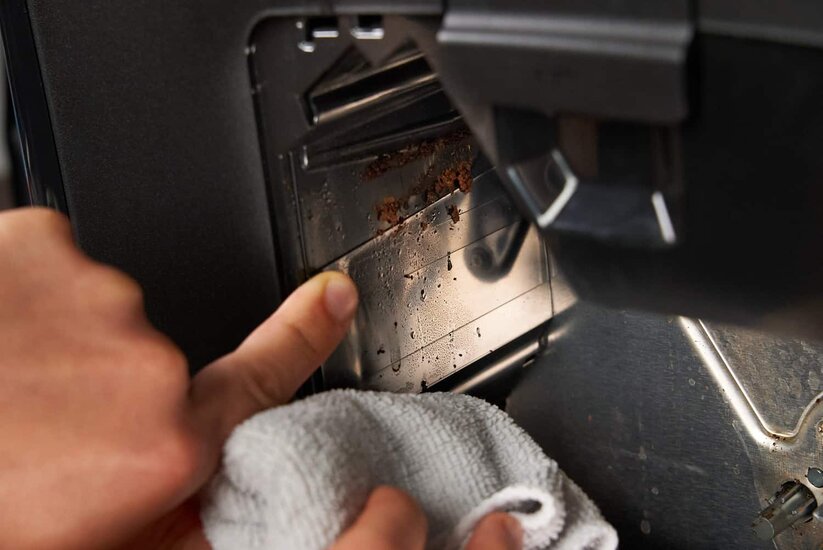
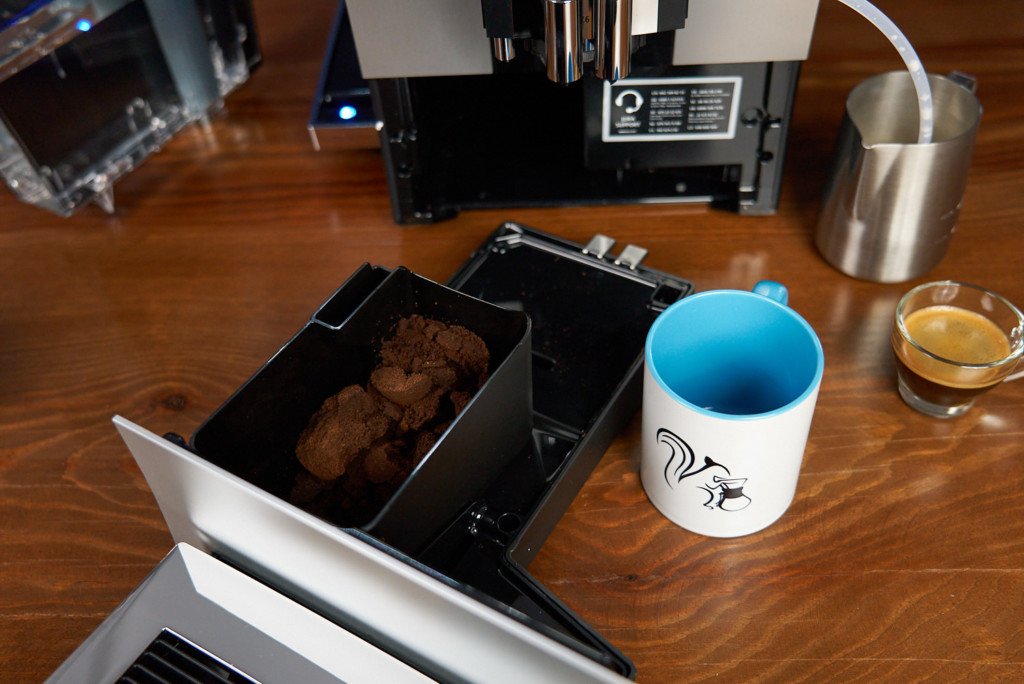
Cleaning the Drip Tray and Coffee Grounds Collection Container
This really isn’t that big of an issue because most fully automatic espresso machines alert you when the dregs drawer and/or drip tray are full. Depending on the machine model, the job shouldn’t take long at all.
Again, I clean these parts
daily, even if the machine doesn’t ask me. Now here, using detergents isn’t a problem. So if you prefer that, go for it.
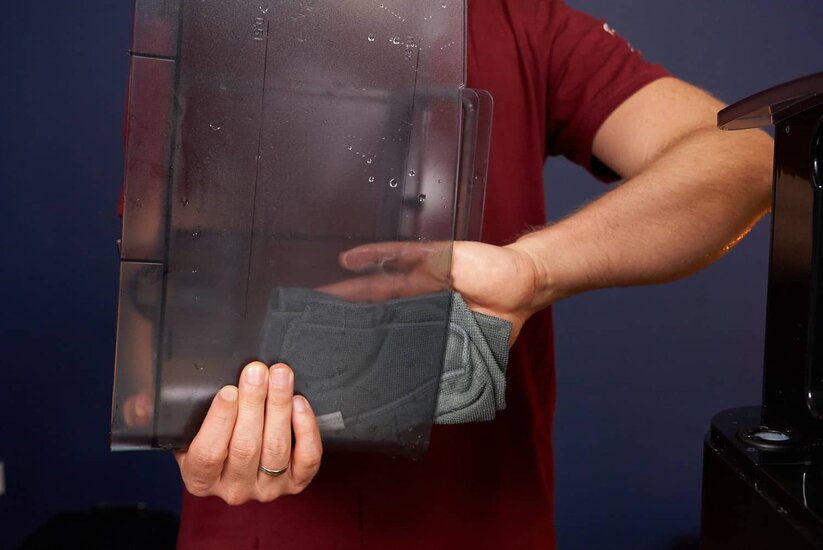
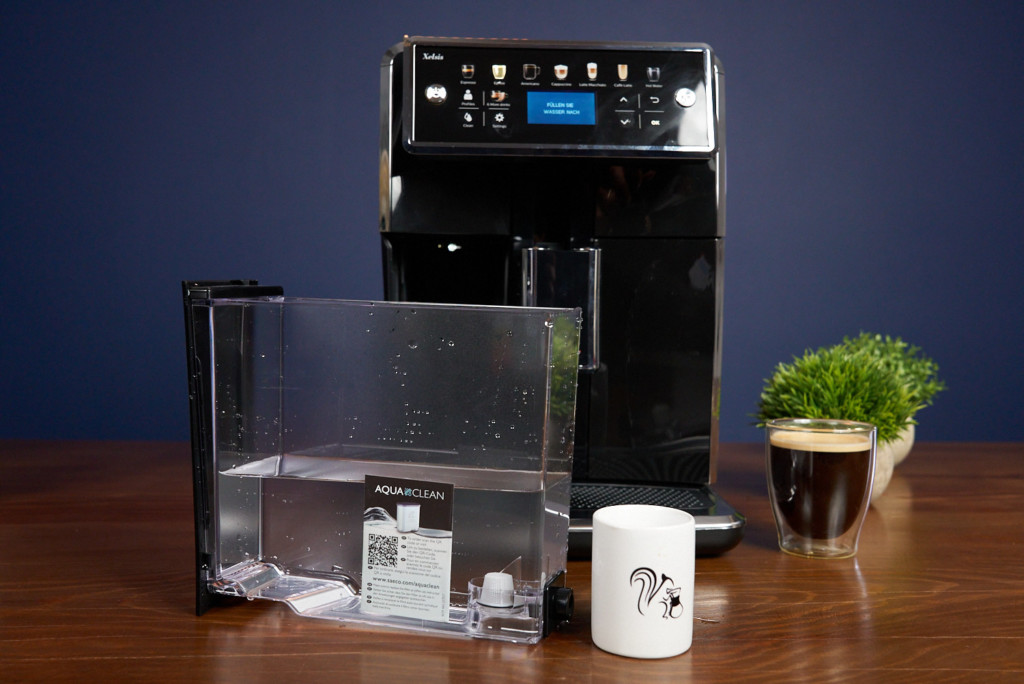
 Cleaning the Water Tank
While you don’t have to worry about coffee residue in the water tank, there’s plenty of other nasty stuff — like algae — that loves water. Once it’s all gross, you’ll have no option but to buy a new one.
So
no free pass on cleaning it. Before refilling the tank, I recommend always rinsing it out with hot water and letting it dry. Then, fill it with fresh, cold tap water and let it drip dry.
More and more models come with a tank that can go in the dishwasher. Hooray for that! Still, it’s good to give it a rinse by hand after it comes out of the machine to get rid of any residual detergent.
On this front, Miele — which is very serious about making its products dishwasher-safe — leads the way.
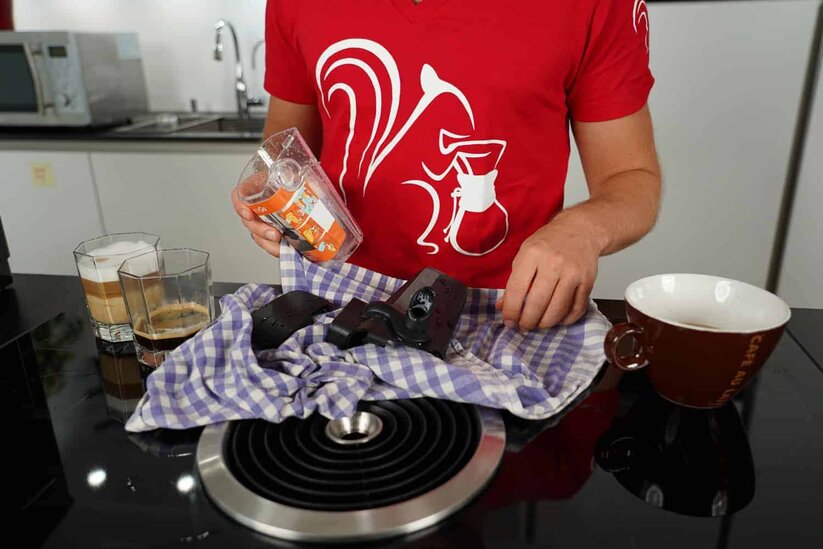
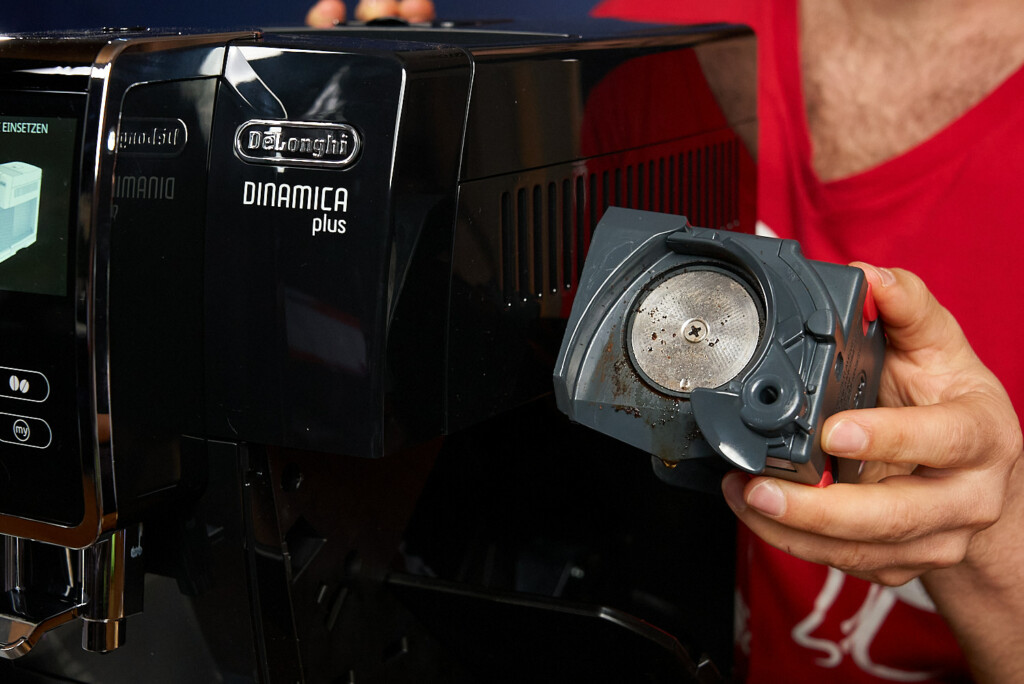
 Cleaning the Grinder
Taking a grinder apart is usually easier than you think. That’s especially the case since many models have a click-and-twist mechanism that allows you separate them into the main components for cleaning.
Sure, cleaning tablets are a quick fix, but these don’t replace manual cleaning.
The good news is that this
isn’t a daily chore. Once or twice a month is enough for intensive use by an average household.
Be warned, though, that if you’ve got a tinkerer’s itch to see each individual part laid out,
you risk voiding your warranty. Disclaimer out of the way, it can be a very rewarding process — if you know what you’re doing.
Best Cleaning and Descaling Agents for Super Automatic Espresso Machines
Don’t make your life harder than it needs to be.
Use the products
recommended by the manufacturer or the cheap alternative based on the same formula. On this point, the manufacturer really does know best.
As a rule, steer clear of home remedies, too, unless you know exactly what you’re cooking up. While something like lemon juice can work wonders on
water kettles, it’s much too aggressive for some automatic espresso machines.
My blog post on
cleaning and descaling goes into detail on the topic.
Descaling a Super Automatic Espresso Machine
If you live in a city — and even if you don’t — listen up.
The water that comes out of your faucet can damage your super automatic espresso machine over time.
No, it’s not a conspiracy theory, it’s what’s known as
hard water, meaning it has high mineral content.
In short, when you heat the water, the calcium and magnesium precipitate out to form deposits. These not only block pipes, but also limit a boiler’s effectiveness and can eventually lead to its failure. Not to mention, excess minerals also make your coffee taste funny.
Descaling is what gets rid of those deposits. Ergo, it’s pretty important. Doing it too often won’t hurt, but if you neglect the job, you could end up with a broken machine. So,
err on the side of shorter descaling intervals and save yourself the trouble.
Using the test strips that come with most machines or calling your utility company will help you figure out how hard your water is so you can calibrate your machine. For additional guidance, I’ve put this table together.
Level U.S. Geological Survey classification Grains per gallon (calcium carbonate) Milligrams per liter, parts per million (calcium carbonate) How often should I descale?
Level
U.S. Geological Survey classification
Grains per gallon (calcium carbonate)
Milligrams per liter, parts per million (calcium carbonate)
How often should I descale?
1 Soft < 1.0 < 17.1 Rarely
2 Soft 1 to 3.5 17.1 to 60 Occasionally
3 Moderately hard 3.5 to 7 60 to 120 Occasionally
4 Hard 7 to 10.5 120 to 180 Frequently
5 Very hard 10.5 and above 180 and above Often
Since this is a very common problem, many fully automatic espresso machines come with a filter already installed or at least have the option to insert one.
Basically, these filters work just like the classic Brita system without being fully integrated into the machine. The filter reduces the water hardness to level 1.

So is a filter your get-out-of-jail-free card for descaling? Not by a long shot. Water filter or not,
descaling is essential. Keep this in mind:
- A water filter won’t eliminate the need to descale but will extend the intervals between running the program.
- If you already have soft water, a filter is unnecessary.
- No matter what the manufacturer says, you should still descale it at least four times a year.
For a deep dive into the topic, read my
article on water filters.
Descaling Done Right: How and When to Do It
One of the first things you do after unboxing a new machine — even on the more affordable ones — is to set your water hardness. This requires a bit of precise programming, so the machine knows you’re using a filter and can decide how often to remind you to descale.
Can’t find your machine’s descaling program? After all, there are a few (cheap) fully automatic machines that don’t have one. In that case, you need to figure out how often to do the job and
find a way to remind yourself. Incidentally, I recommend descaling at least once a month.
Also bear in mind that you need to replace filter cartridges on a regular basis, which can quickly become far more expensive than routine descaling.
I’m going to say it again because it’s just that important: even with a filter, you still need to descale.
My advice on choosing descaling products is much the same as for cleaning detergents: stick to the manufacturer’s recommendation, above all on the type of product. However, feel free to go with a cheaper brand if it’s otherwise identical.
Greasing and Lubricating a Super Automatic Espresso Machine
You want your fully automatic espresso machine to be
a well-oiled machine in every sense of the word, and that means including lubrication as part of your maintenance.
That grease keeps your espresso machine’s rails and hinges moving smoothly so that the tamping and brewing
mechanisms function flawlessly.
If you clean your brew unit daily, you should grease it once a month. And, of course, check out the user manual for exactly what to do.
You need a lubricant that is
food safe, so put away that bike oil.


 .
.
